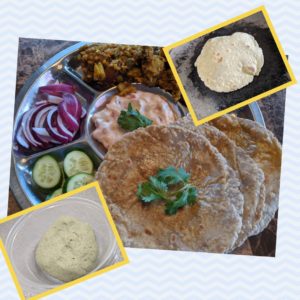

Coconut chapatis (aka rotis) are part of a Sri Lankan cuisine, which now can be made gluten-free with Metta flour. I actually love the way the coconut flour tastes in this recipe making the chapatis extra soft and healthier with a slightly sweet taste.
Yield: 6-8 flatbreads of about 6-7 inches in diameter
Prep time: 5 minutes
Resting time: 15-20 minutes
Cook time: 15 minutes
Total time: 20 minutes
Ingredients
- 1 cup of Metta flour
- 2 Tbsp of coconut flour*
- ½ cup + 2 Tbsp water*
- ¼ tsp of salt
- ¼ tsp baking soda
- ½ tsp lime or lemon juice (to activate the soda for extra softness and fluffiness)
- ¼ cup of dry Metta flour (for dusting and sprinkling)
- (optional, but recommended) 1-2 tablespoon of oil or ghee to spread on the chapati once cooked*
Note: *To intensify the coconut taste, you can certainly add more coconut flour in this recipe, but remember to add roughly that equal amount of water because coconut flour is super absorbent requiring more liquid than other flours. Note that in this recipe, with 2 Tbsp coconut flour, I added 2 Tbsp of water. If you like coconut flour in your chapatis for health reasons, and because coconut flour does make the chapatis softer, but not the coconutty taste and smell, add 1/4 amount of lemon or lime juice, which helps to disguise the smell and taste in the chapatis. (For example, in this recipe since I have 2 Tbsp of coconut flour, I would add 1/4 Tbsp of lemon juice.) I know some North Indians who absolutely despise the smell and taste of coconut in food, I actually love it!
Tools Needed
- Rolling pin
- Skillet (preferably non-stick or hard anodized pan)
- Rolled up clean paper towel or muslin cloth
Instructions
- In an open wide bowl, stir together the flours, salt, baking soda, lime or lemon juice, and water. Mix and knead until the dough starts to pull away from the sides. (I knead the dough in an electric mixer for about 5 minutes using the dough hook so it is kneaded to perfection without tiring the arms.)
- If the dough seems too dry, add a little water and if it is too sticky, add a little flour. It should not stick to your hands nor should it be wet. Knead the dough until a soft pliable dough is formed. One of the secrets for soft chapati is dough that is well kneaded.
- Once a soft yet firm dough is achieved, put it in a container with a cover to avoid developing dry skin on it. For best results, leave it in the fridge for at least 15-20 minutes. For best results, use dough within 48 hours of initial kneading.
- Preheat lightly oiled skillet, or tawa, to medium-high heat. Smear a little dry flour on your hands before making the dough balls to prevent the dough from sticking to your hands. Divide the dough into small balls. Make the dough balls a size you can easily manage. You can either make all the dough balls at once or one-at-a-time as you cook each chapati on the skillet.
- When ready to roll, dip each dough ball in its entirety into dry flour to avoid sticking to the rolling pin. Place it on a clean counter top, or chokki, to roll using a rolling pin.
- Start rolling it evenly applying gentle pressure (if it starts breaking or sticking to the counter or rolling pin, you may be pressing too hard). Turn it over if needed forming a nice round circle. Don’t worry if you are not able to make it a nice round shape. In order for the chapati to rise and puff up on the pan, it is important for the chapati to be equally flattened all around. You will likely need to use more dry flour while rolling it to prevent it from sticking to the counter. Brush off the access dry flour if it doesn’t start to settle on the chapati dough as you’re rolling it. Thin it out to your preference.
- Place it on a hot skillet. Ideal skillet temperature for these chapatis is 500 to 550 F. Let the side cook for about 15-20 seconds.
- When you start seeing small specks of bubbles on the chapati, turn it over.
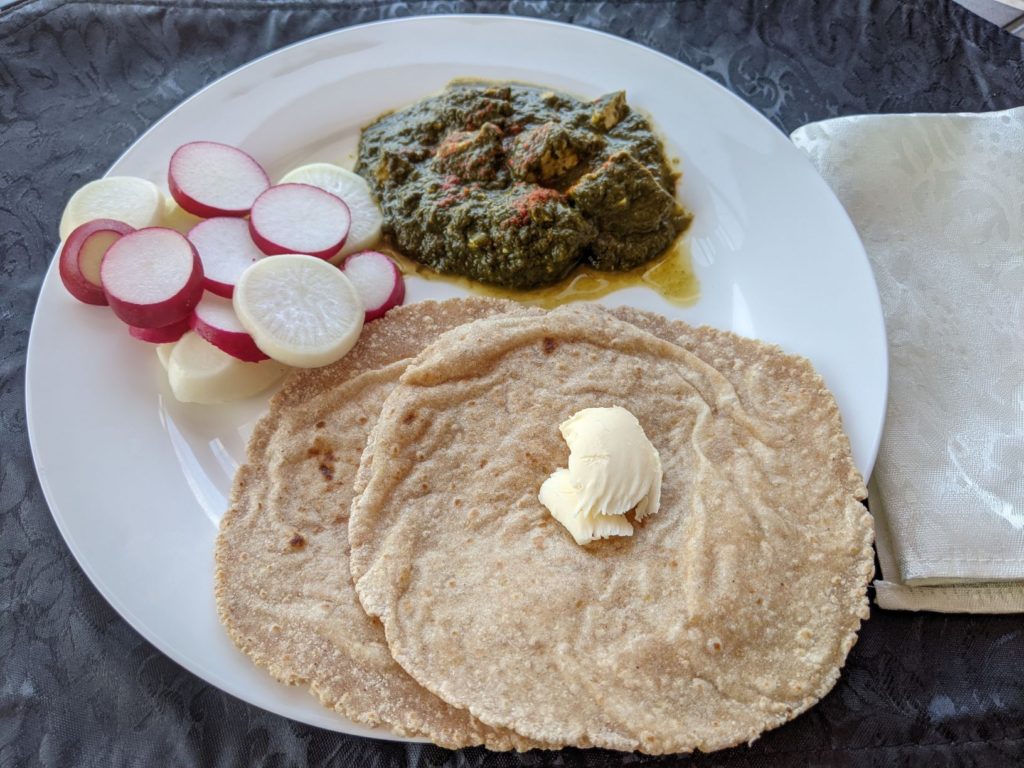
- Cook the other side for about 40-45 seconds, then turn it again. Leave it cooking for about 3-5 seconds, then using a clean paper towel or muslin cloth, push down the sides very gently. Move to pressing gently particularly on the section that is already puffing up. Keep pressing down on the puffed areas of the chapati causing it to rise and fluff up all over. This whole process of helping the chapati rise should last approximately 15-20 seconds. After it has fluffed up all the way or most of the way, remove it from the skillet onto a tortilla warmer dish or in a container in a clean kitchen towel and smear a little oil or butter or ghee on it to lock in some moisture. Don’t worry if it doesn’t fluff up all the way, it will still taste good. Be careful not to overcook and get it too crispy because then it may not be as soft.
- Best served warm, with a little oil or butter or ghee on it.
- Repeat steps 5 – 11. Enjoy them with any type of curry, eat as a soft tortilla with filling of your choice or with a spread for breakfast or anytime snack!
- If making a bunch of chapatis at once, it is best to stack them in a foil, but you can also stack them in a tortilla warmer or in another container wrapped in a cloth. This will keep them warm and soft for hours.
- If any left over, save them in a foil or zip lock bag over night on the counter and eat them the next day after warming in a zip lock bag or a tortilla warmer for 10-15 seconds in the microwave. You can also store them in the refrigerator in a tightly sealed bag and consume within 2-3 days. They may harden as made without any preservatives, but warming them in the microwave or on a hot skillet will make them very soft and pliable again.
Please Note: If you are new to making chapatis/tortillas, please be patient with yourself and the dough, it takes time and some practice to get the hang of it! Below are a few links to YouTubes videos on how to prepare the dough and make the chapatis. Although these videos are for regular dough and chapatis, not for coconut chapatis, the process is the same.
Have you used Metta gluten-free flour for this recipe or any other recipe?
Kindly take a moment to leave a review here to help our community!
Any questions or concerns or ideas on how to improve our recipe and/or process, please feel free to contact us at mettagfatta@gmail.com